IoTセンサーデータをPostgreSQLに保存してPower BIで見る

IoTはじめました
IoTの活用はクラウド利用が必須、IoTオプションやIoTサービスなどが必須と思われがちです。
またBIツールとIoTデバイス をどのように連携させるのか、イメージしにくいかと思います。
今回はクラウドを使わず、LinuxにMQTTブローカーとPostgreSQLを用意してセンサーデータを収集します。
クラウド(Azure)を使ったセンサーデータの収集と分析は以下の当社ブログをご参照ください。
・ESP32のデータをSynapse Sparkでグラフ表示
1.目的
使い慣れたデータベースとBIツールでセンサーデータを見たい。
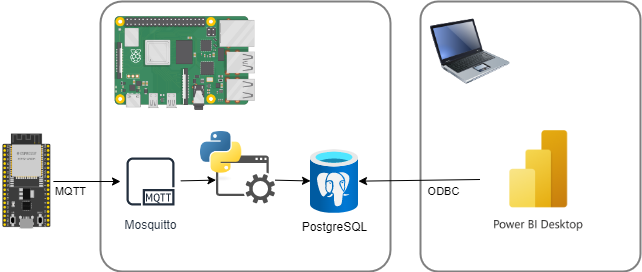
2.構成
2-1 ハードウェア
- Linux機: Raspberry Pi 4 Model B 4GB
- Linux: Raspberry Pi OS
- MQTTブローカー: Mosquitto
- RDBMS: PostgreSQL
- IoTデバイス: ESP-WROOM-02
- BIツール: Power BI Desktop
- MQTT をサブスクライブして DB に保存:
- 言語:Python
- MQTT ライブラリ: eclipse/paho.mqtt.python
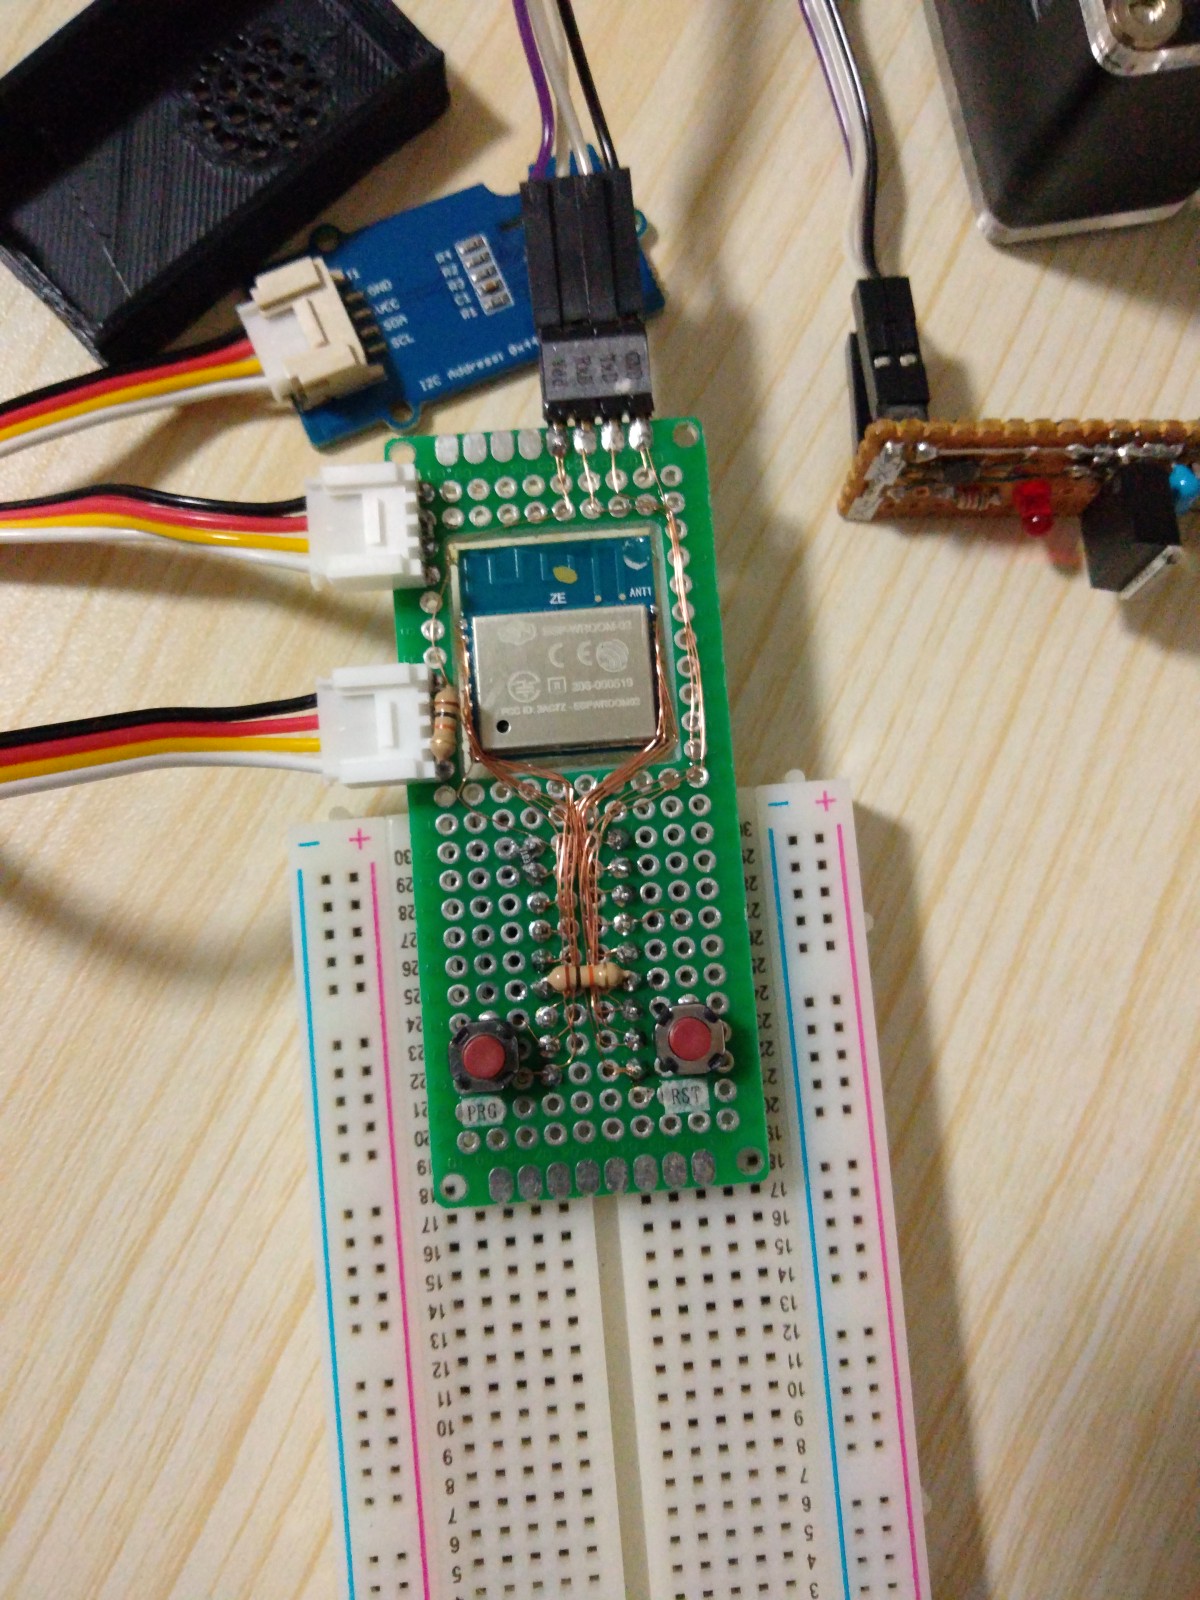
2-2 完成品(ハードウェア)
・Raspberry Pi 4とESP8266とセンサーと液晶
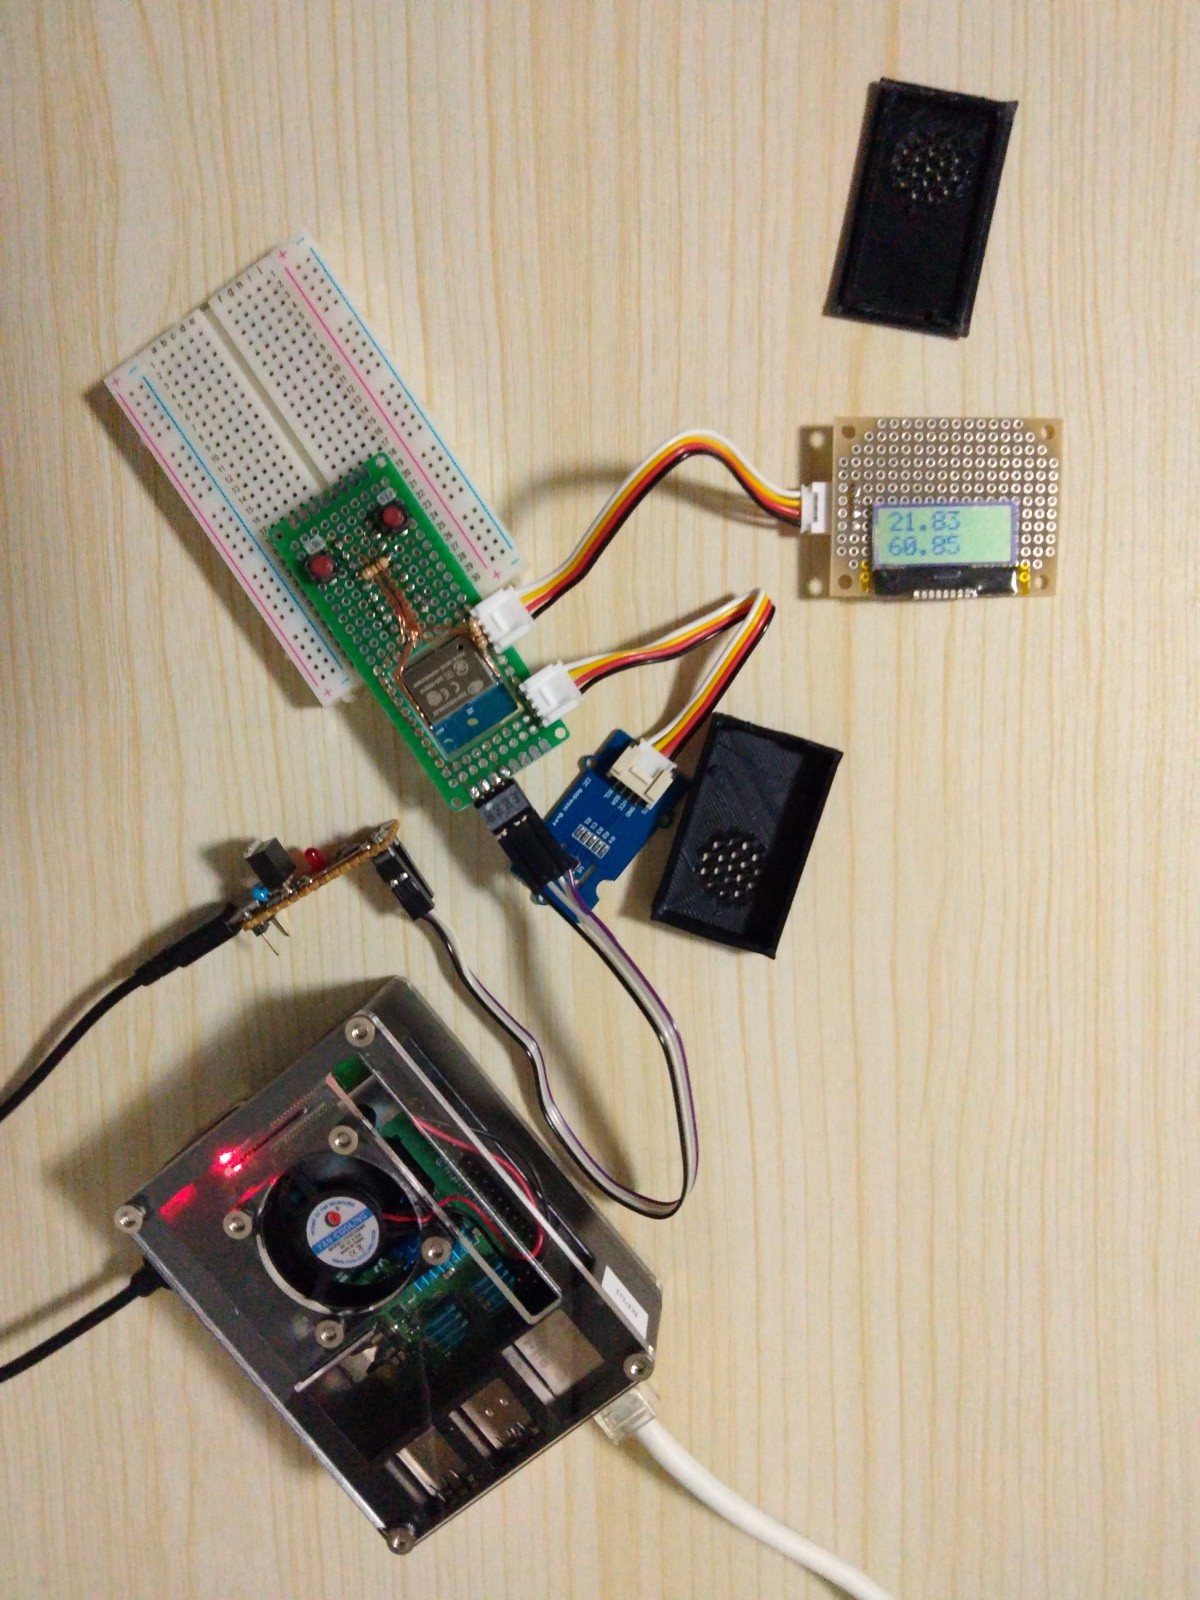
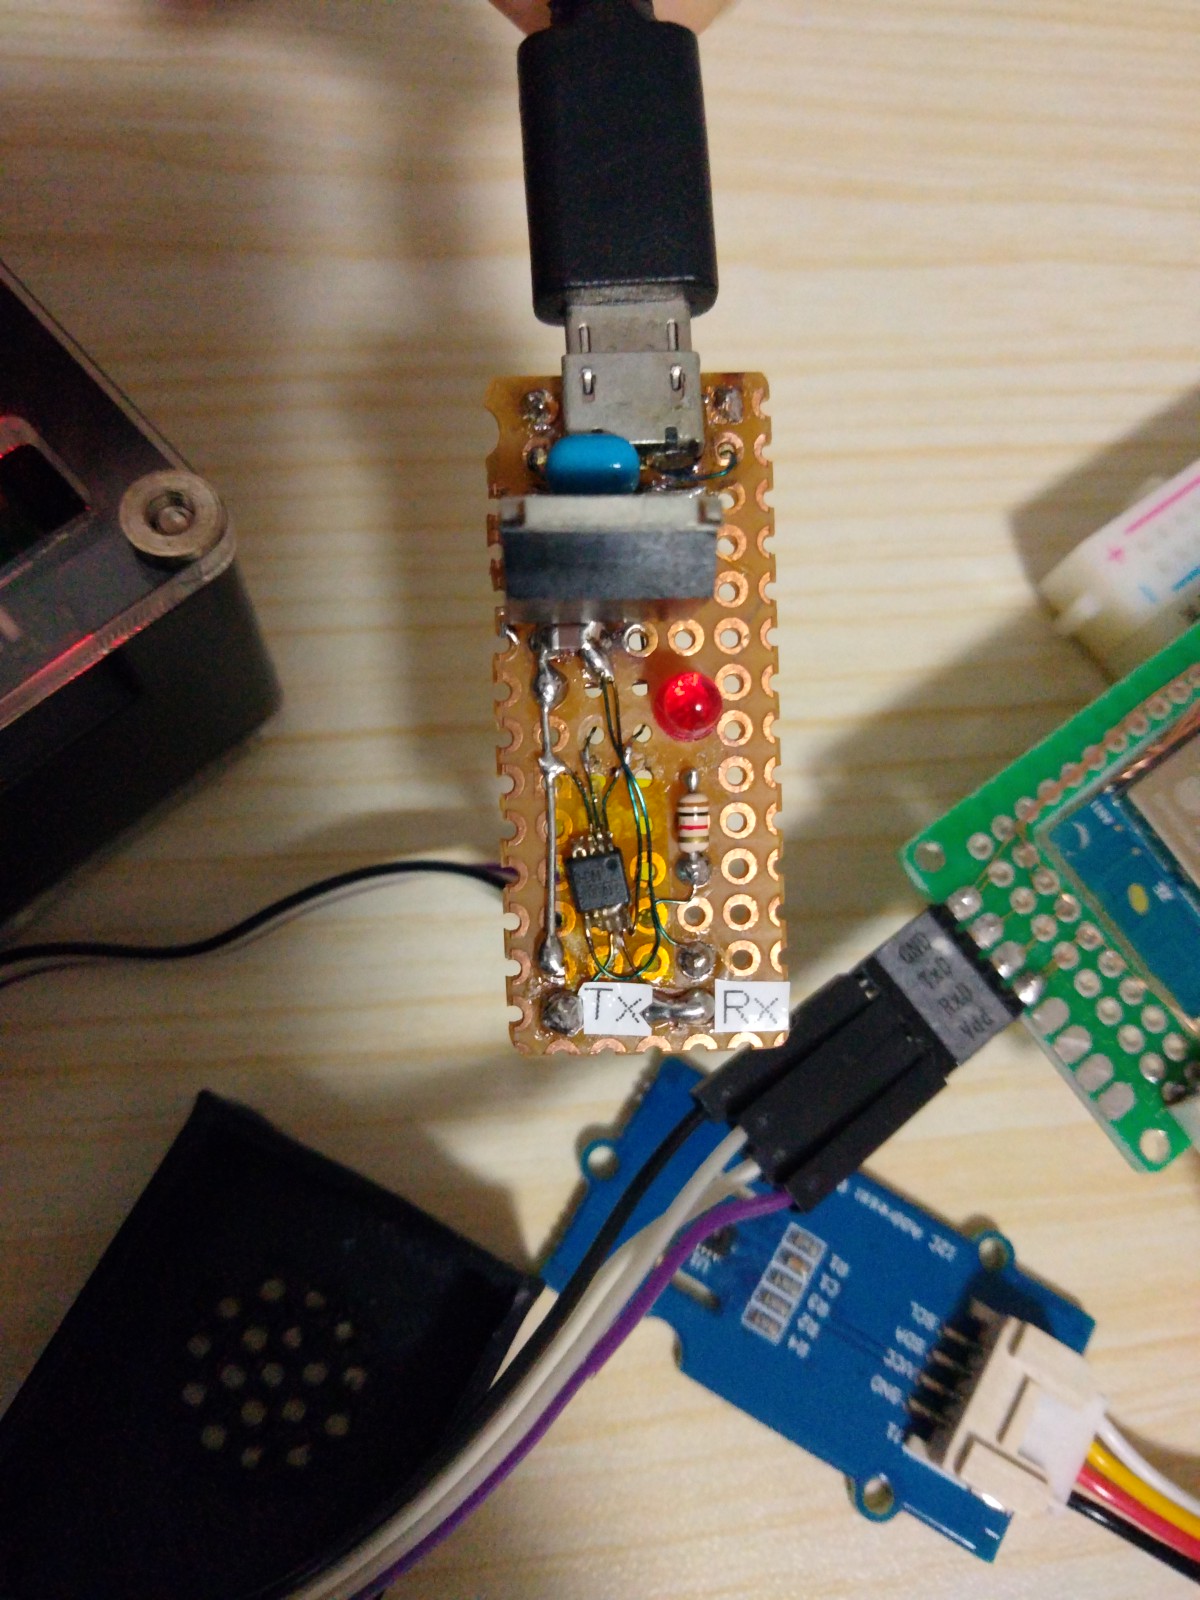
・マイコン(ESP8266)
・USBシリアル変換(CH340E)
・液晶(AQM0802)
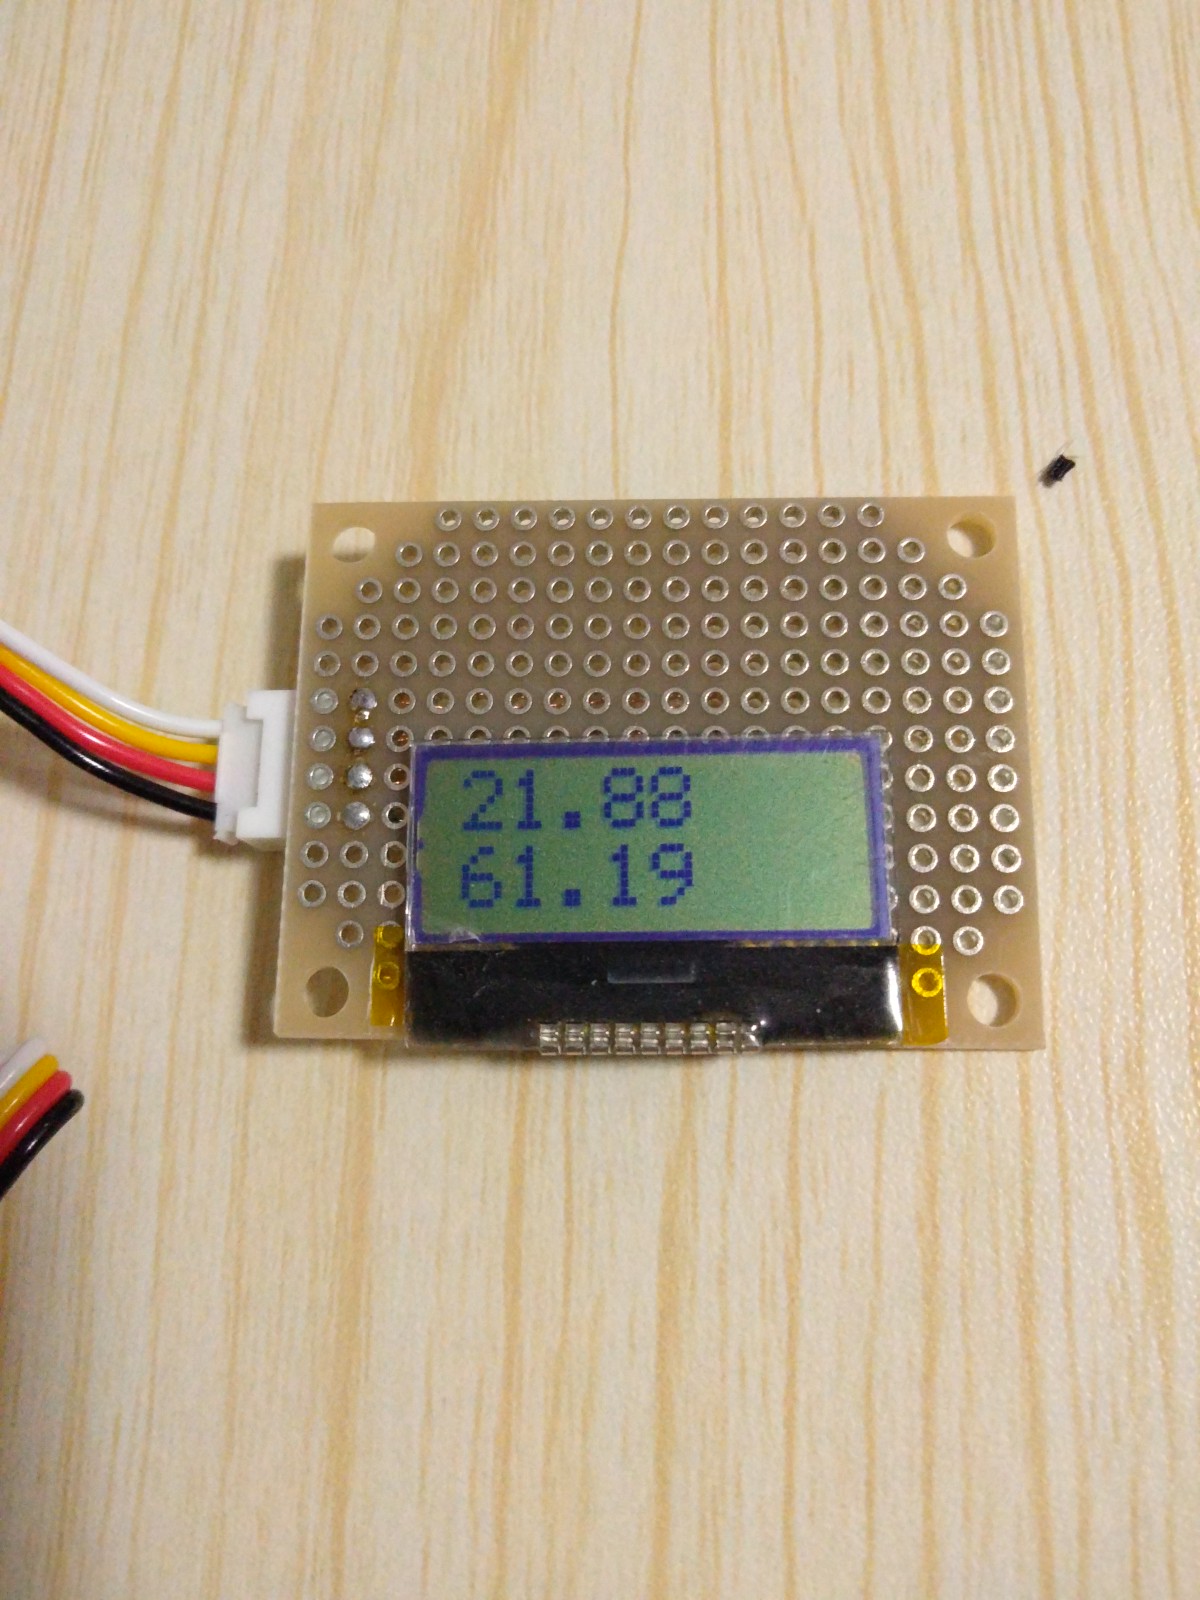
・温湿度センサー(SHT31)

2-3 データベースに保存するテレメトリーとテーブルの構造
<前提>
- IoT からは 温度と湿度を送信します
- 温度と湿度を別々のテーブルに記録します
- サーバで受信した時刻を記録します
- デバイスから送信した時刻は記録しません(今回はデバイスで時刻を保持しないため)
<構造>
●温度データ
・テーブル名:DeviceTemplature
・カラム:DeviceID、ArrivalTime、Value
●湿度データ
・テーブル名:DeviceHumidity
・カラム:DeviceID、ArrivalTime、Value
2-4 MQTTデータとトピックの構造
<前提>
- トピックの構成として「デバイスID/送信データの種別」という形でセンサーデータを個別に送信します。
- 今回はデバイス単位に温度と湿度を1つのJSONにまとめる方法も考えられます。
- 複数の小さなセンサーデータを同時に送信する場合は送信回数が減らせるメリットがあります
- 今回は温度と湿度のみなので個別に送信します。
- 今回はデバイスへの送信(デバイス側でMQTTをサブスクライブ)はしません。
トピック(温度):room-measurements/<デバイスID>/temperature
トピック(温度):room-measurements/<デバイスID>/humidity
2-5 概要
Linux(Raspberry Pi) にMQTTブローカーMosquitto、RDBMS PostgreSQLをインストールしてIoTデバイスから受け取ったデータをデータベースに格納する。
MQTTをデータベースへの保存はPythonで行う。
3.手順
3-1 OSのインストール
- Raspberry Pi OSをダウンロード
ホームページからOSイメージをダウンロードしてxzコマンドで解凍。
イメージをkpartxでループバックにマップしてcpioコマンドで書き込む。 - microSDカードにOSを書き込む
今回はrootfsのファイルシステムをF2FSにしてダウンロードしたイメージをcpioコマンドでmicroSDに書き込んだ。
bootのcmdline.txtに書かれているrootfstypeとrootのPPIDの変更が必要。
rootfs内の/etc/fstabのFSTypeとPARTUUIDの変更も必要。 - ネットワークの設定
dhcpcd.confを編集して IPアドレスを固定化、ホスト名の通知を設定。 - ユーザーの作成
(Raspberry Piを起動する前に設定するのを忘れて、最初の起動時に動く作成スクリプトに助けられました。) - ssh接続確認
bootにsshというファイル(中身は空っぽ)を作成。
OS起動後にsshdが起動していることをpsで確認した。 - セキュリティアップデート
apt updateとapt upgradeをrootで実行(sudoを使ってもよい)。
やったほうが良かったこと:
- キーボード配列を日本語キーボードに変更
- ヘッドレスでやろうと思ったがIP固定の設定を間違えて ラズパイがネットで迷子になった。
- テレビのHDMIに接続してログインできたが、キーボードの ‘|'(パイプ) が見つからず、psコマンドの結果をファイルに吐き出してからgrepを実行することになってしまった。
3-2 PostgreSQLとMosquittoのインストール
- PostgreSQLのインストール
apt install postgresqlをrootで実行。
(もしくはsudo権限のあるユーザーでsudo apt install postgresql) - Mosquitto(ブローカーとクライアント)のインストール
apt install mosquitto mosquitto-clientsをrootで実行。
(もしくはsudo権限のあるユーザーでsudo apt install mosquitto mosquitto-clients)
注意点:
- `apt search<検索文字>` でパッケージリポジトリを検索できる。
root権限は不要。 - Debian系だと`apt install postgres`でTABを押すと補完して`apt install postgresql`となってくれる。
postgだと候補が多いのでTAB1回だと補完してくれない。
TABを2回押すと候補が表示される。 - Debian系は`ll`コマンド(実際にはエイリアス)がない。
ホームフォルダの`.bashrc`ファイルを編集して再度ログインすると使える。
編集は`ll`へのエイリアスがコメントアウトされているのでコメント削除のみ。
3-3 MQTTの設定
下記設定を追加。
bind_address 0.0.0.0
allow_anonymous true
3-4 データベースの作成
- postgresユーザーのパスワード変更
- ユーザー (role) の作成
createuser –pwprompt –interactive iotuser - Database作成
postgresユーザーで「createdb iotdb」を実行。 - 外部から接続するための設定
下記ファイルを編集
/etc/postgresql/13/main/postgresql.conf
listen_address = '*'
を追加SSL=on
をoffに変更/etc/postgresql/13/main/pg_hba.conf host iotdb all 192.168.11.0/24 password
を追加 (ネットワークアドレスは適宜変更)
3-5 テーブルの作成
create table "DeviceTemperature" ("MessageID" uuid, "DeviceID" text, "ArrivalTime" timestamp, "Value" numeric(5,2));
create table "DeviceHumidity" ("MessageID" uuid, "DeviceID" text, "ArrivalTime" timestamp, "Value" numeric(5,2));
4.Pythonの準備
4-1 Python3-venvをインストール
root権限で下記を実行
apt -y install python3-venv
4-2 仮想環境を構築
ディレクトリを作成してvenvを実行
mkdir python_mqtt2db
python3-venv python_mqtt2db
4-3 作成したディレクトリに移動して環境をロード
cd python_mqtt2db
source ./bin/activate
4-4 wheelとpaho-mqttとpsycopg2-binaryをインストール
pip install wheel paho-mqtt wheel psycopg2-binary
5.IoTデバイスの準備
今回も Arduinoで作成。
コードは下記の通り。
接続先の情報(Wi-Fi、MQTTサーバーのIPなど)は適宜変更。
#include "Wire.h"
#include "Adafruit_Sensor.h"
#include "Adafruit_SHT31.h"
#include "ESP8266WiFi.h"
#include "MQTT.h"
#include "ST7032.h"
#include "UUID.h"

// センサーデータ送信間隔(ミリ秒)
const unsigned long sendIntervalMillis = 3000;

// Wi-Fi設定
const char* ssid = "Wi-Fi SSID";
const char* password = "SSID PSK";

// MQTTクライアント設定(MQTTトピックで使用)
const char* mqtt_clientid = "esp8266-1";

// MQTTブローカー設定
const char* mqtt_server = "192.168.0.3";
const int mqtt_port = 1883;
const char* mqtt_topic_base = "room-measurements/";

Adafruit_SHT31 sht31 = Adafruit_SHT31();
WiFiClient wifiClient;
MQTTClient mqttClient;
ST7032 lcd;
UUID uuid;
unsigned long nextSendMillis;

void setup() {
  // シリアル通信を開始
  Serial.begin(115200);

  // ST7032を初期化
  lcd.begin(8, 2);
  lcd.setContrast(23);
  lcd.print("Hello.");

  // SHT31を初期化
  if (! sht31.begin(0x44)) {
	Serial.println("Couldn't find SHT31");
	while (1) delay(1);
  }
  Serial.print("Heater Enabled State: ");
  if (sht31.isHeaterEnabled()) {
	Serial.println("ENABLED");
  } else {
	Serial.println("DISABLED");
  }

  // Wi-Fiに接続
  Serial.print("Connecting to ");
  Serial.println(ssid);
  WiFi.begin(ssid, password);
  while (WiFi.status() != WL_CONNECTED) {
	delay(500);
	Serial.print(".");
  }
  Serial.println("Connected to WiFi");

  // MQTTブローカーに接続
  Serial.print("Connecting to MQTT Broker.");
  mqttClient.begin(mqtt_server, mqtt_port, wifiClient);
  while (!mqttClient.connect(mqtt_clientid)) {
	delay(500);
	Serial.print(".");
  }
  Serial.println("nConnected to MQTT Broker");
  uuid.setVariant4Mode();
  nextSendMillis = millis() - 1;
}

void loop() {
  if ( millis() > nextSendMillis ) {
	// 次回送信タイミングを設定
	while(millis() > nextSendMillis) nextSendMillis += sendIntervalMillis;

	// 温度を取得
	float temp = sht31.readTemperature();
	// 湿度を取得
	float humidity = sht31.readHumidity();

	String topic = "";

	uuid.generate();

	// 温度をMQTTで送信
	topic = String(mqtt_topic_base);
	topic += mqtt_clientid;
	topic += "/temperature";
	mqttClient.publish(topic, String(temp, 2) + "," + uuid.toCharArray());
	  // 湿度をMQTTで送信
	topic = String(mqtt_topic_base);
	topic += mqtt_clientid;
	topic += "/humidity";
	mqttClient.publish(topic, String(humidity, 2) + "," + uuid.toCharArray());

	// ST7032に温度と湿度を表示
	lcd.setCursor(0, 0);
	lcd.print("        ");
	lcd.setCursor(0, 0);
	lcd.print(String(temp, 2));
	lcd.setCursor(0, 1);
	lcd.print("        ");
	lcd.setCursor(0, 1);
	lcd.print(String(humidity, 2));

	// シリアルに温度と湿度を送信
	Serial.print("Temperature:");
	Serial.println(String(temp, 2));
	Serial.print("Humidity:");
	Serial.println(String(humidity, 2));
  }

  delay(10);
}
5-1 MQTTデータをデータベースへ格納(Python)
Pythonコードは下記の通り。
#!/usr/bin/env python3
import paho.mqtt.client as mqtt
import psycopg2
import datetime

# MQTTブローカーに接続できたときのコールバック
def on_connect(client, userdata, flags, rc):
	print("Connected with result code "+str(rc))

	# トピックを指定してサブスクライブ
	client.subscribe("room-measurements/#")

# PUBLISH message を受け取ったときのコールバック
def on_message(client, userdata, msg):
	now = datetime.datetime.now()
	(value, msgid) = msg.payload.decode().split(",")
	topic = msg.topic.split("/")
	# print("{0:%Y/%m/%d %H:%M:%S} {1:9s} {2:11s} {3:>6s} {4:s}".format(now, topic[1], topic[2], value, msgid))
	conn = connectDb()
	if not conn.closed:
		cur = conn.cursor()
		if topic[2] == "temperature":
			cur.execute('insert into "DeviceTemperature" values (uuid(%s), %s, %s, %s)', (msgid, topic[1], now, value))
		if topic[2] == "humidity":
			cur.execute('insert into "DeviceHumidity"    values (uuid(%s), %s, %s, %s)', (msgid, topic[1], now, value))
		conn.commit()

def connectDb():
	return psycopg2.connect("dbname=iotdb user=iotuser password=passwordstring")

client = mqtt.Client()
client.on_connect = on_connect
client.on_message = on_message

client.connect("localhost", 1883, 60)

# print("date time           ClientID  Type         Value")
# print("------------------- --------- ----------- ------")

# Blocking call that processes network traffic, dispatches callbacks and
# handles reconnecting.
# Other loop*() functions are available that give a threaded interface and a
# manual interface.
client.loop_forever()
5-2 PythonスクリプトをSystemdサービスに登録
OS起動時に起動&スクリプト終了時の自動起動を設定。
自動起動はServiceセクションのRestartをyesに。
5-3 Power BIでダッシュボードを作成

6.おわりに
DBにデータが入ってしまえば、IoTとは関係なくデータを操作しやすくなるので良かったです。
下記のようなことが何の障壁もなくできそうです。
- DB側で他のセンサーデータを混ぜたMartテーブルを作成
- 別のBIツールでデータを参照
- Excelでデータを利活用